Getting Started with Canvas
Ready to get started building your course out in Canvas? This guide will give you the basics plus some additional options you might find useful. You can schedule an appointment with a Canvas expert for additional help.
1. Find Your Course Site at canvas.emory.edu
- Login to Canvas with your Emory NetID and password.
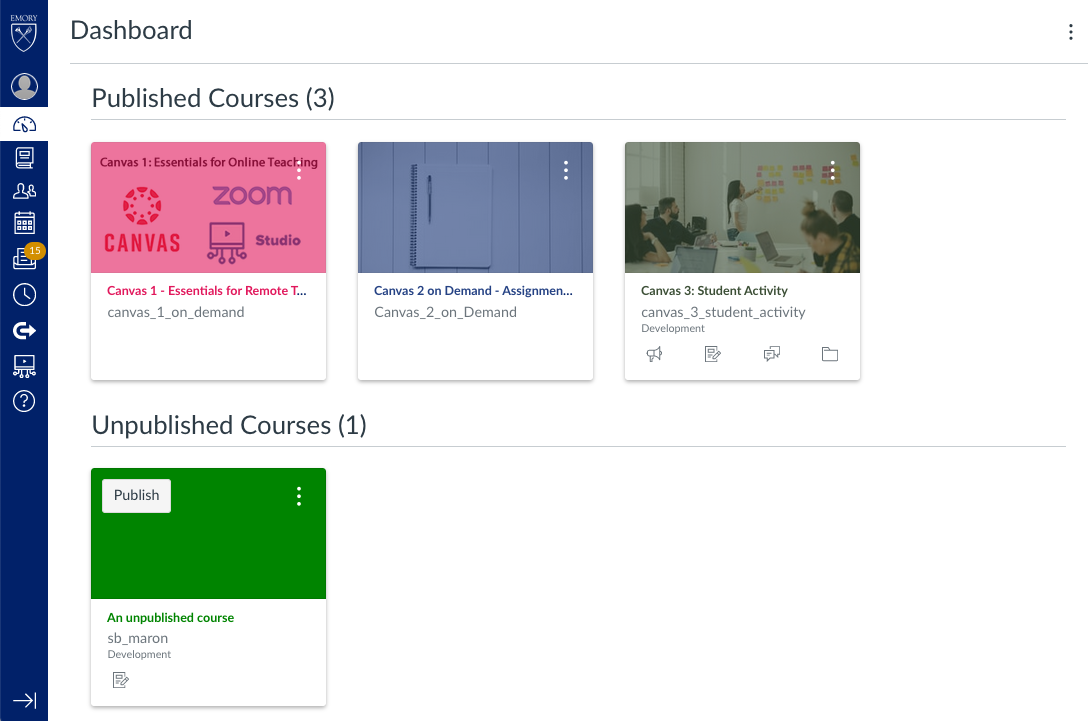
- Your Dashboard will show colored cards for your active courses. Click on the course you want to build out to access it.

2. Add New Content
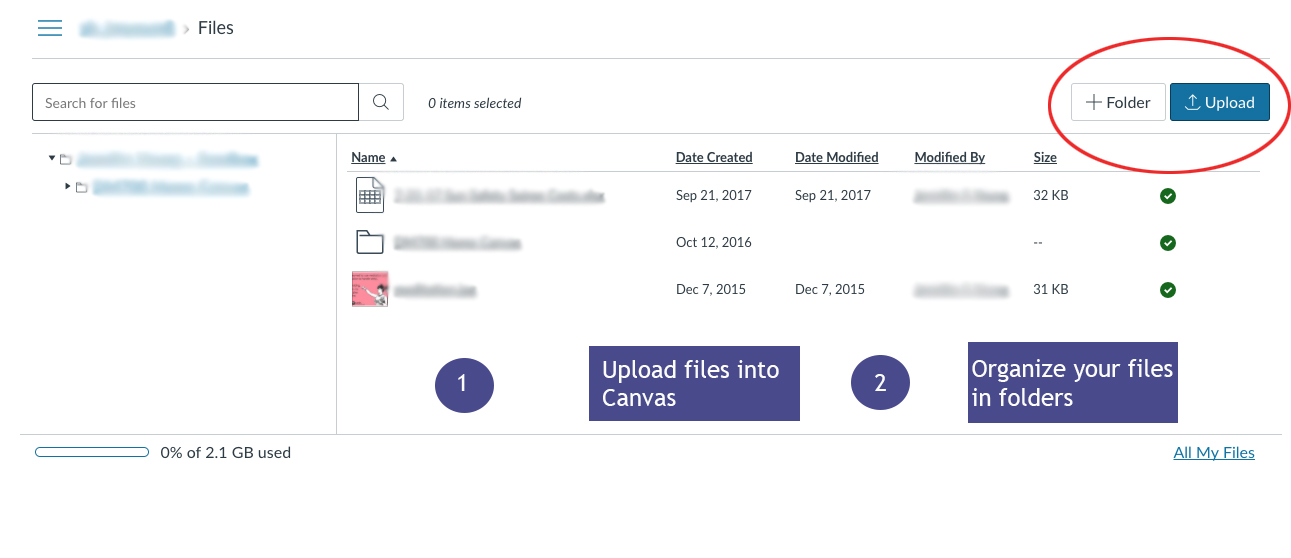
- Upload files: Under Files, you can upload files individually or in bulk, set usage rights, and restrict or schedule which files are available to students.

- You may also import and reuse material from prior classes
Things to Remember
- Each Canvas course starts with 2 GB of space. If you require additional space, please e-mail classes@emory.edu.
- Courses listed in OPUS are automatically added to the instructor of record’s list of courses on Canvas when they get released by the Registrar, so there is no need to request an OPUS course.
- Hide content you don't want your students to see by restricting their access or scheduling its availability to students.
- Back up all of your files on your computer and on a flash drive and/or a cloud storage service (OneDrive, etc.) Do not use Canvas as a place to store your files!
3. Create or Upload your Syllabus
There are a couple of ways you can create/add a syllabus to your course.
- Canvas Syllabus feature: Create a page in Canvas to post your Syllabus.
- Click Syllabus in the Course Menu
- Click "Edit" in the top right corner
- Type your syllabus with the text editor. You can also add images, insert links, and embed media.
- Link to your Syllabus and other Files in the righthand menu
- Upload syllabus as a file: If you wrote a Syllabus in Word or a PDF, you can upload your Syllabus to Files and then link to it on pages in your course. You don't have to use the Syllabus page, but it's a nice option.
Things to Remember
- Assignments you create in your course will automatically show up under your course syllabus on the Syllabus page
- You can set your Syllabus as your course homepage (see #5 below) and/or link to it from other parts of your course (i.e., Assignments pages and Modules).
4. Add Modules and Assignments
- Modules: You can organize your course content by week, topic, or other category using the Modules tool.
- Assignments: Create graded or ungraded Assignments for your course, which will be added to the Gradebook.
Things to Remember
- Not Graded assignment types don't show up in the Gradebook. You can create ungraded assignments that appear in the Gradebook by creating a graded assignment and giving it a grade value of 0.
- Set due dates for your Assignments.
- Take advantage of the indent feature in Modules. This is helpful for organizing your content and making it easily accessible to students.
- Check your Gradebook to make sure all assignments are accounted for with the correct grading value (points, percentage, etc.)
5. Set Your Course Homepage
Your course homepage is the first thing students see when they view your course. You can set your course homepage to one page only, but there are several options, depending on what you want to be most accessible for your students. Here are some recommendations:
- Modules: set your homepage to the Modules page to allow students to view all of the available coursework, readings, and other content for each week or subject.
- Syllabus: set your homepage to the Syllabus so students can quickly view the course outline and due dates.
- Customized Page: in Pages, you can create a customized homepage using text and images. Check out the Canvas Commons for examples.
6. Publish Your Content
- Make sure all of the content you want students to see is published.
- See how your course appears to students before publishing it by using the Student View tool.
- How to know if your content is published (and if not, how to publish it):
- Modules: click "publish" on the far right side of each item in a module. If an item is published, the green circle will be checked.
- Syllabus page: simply save the Syllabus and it will publish.
- Other pages: click "publish" at the top." If a page is published, the box at the top will be green and say "Published."
7. Publish Your Course
- Once your course is ready, publish it!
- You can always add more content and edit parts of your course later.
More Things You Can Do
- Create Pages: The Pages feature in Canvas lets you create Pages with images, text, and links to post your course content (like a webpage). You can create as many pages as you want in your course.
- Create a Rubric: Rubrics in Canvas are useful for creating a grading scheme for specific assignments or assignment types. Once you create a Rubric, you can add a Rubric to an Assignment you've created.
- Use SpeedGrader: Easily grade and post comments on individual and group assignments with the Canvas SpeedGrader feature.
- Use Turnitin for plagiarism detection: Papers submitted through Canvas can be checked against Turnitin's content databases.
- Use External Tools: Use external tools like Canvas Studio, Office365, and VoiceThread within your Canvas courses. Learn more about the external tools that are available.
- Add People: Use the People tab in the sidebar to add TAs, librarians, and others to view or edit your course.